When I last signed off, I had dismantled a large chunk of the nastiness that I call "Transfer Case Neglect." I removed the major components (the main case, front output cap, rear output cap) and disassembled the internals of the main case. After completing most of the cleaning, I halted. This was mostly out of fear that I would eventually forget how to put it all back together since I had to wait for parts to arrive and then my family and I traveled to DC for a week. (Shout out to the Lt. Col and the lawyer!)
Upon return, with parts in hand, it was time to get busy!
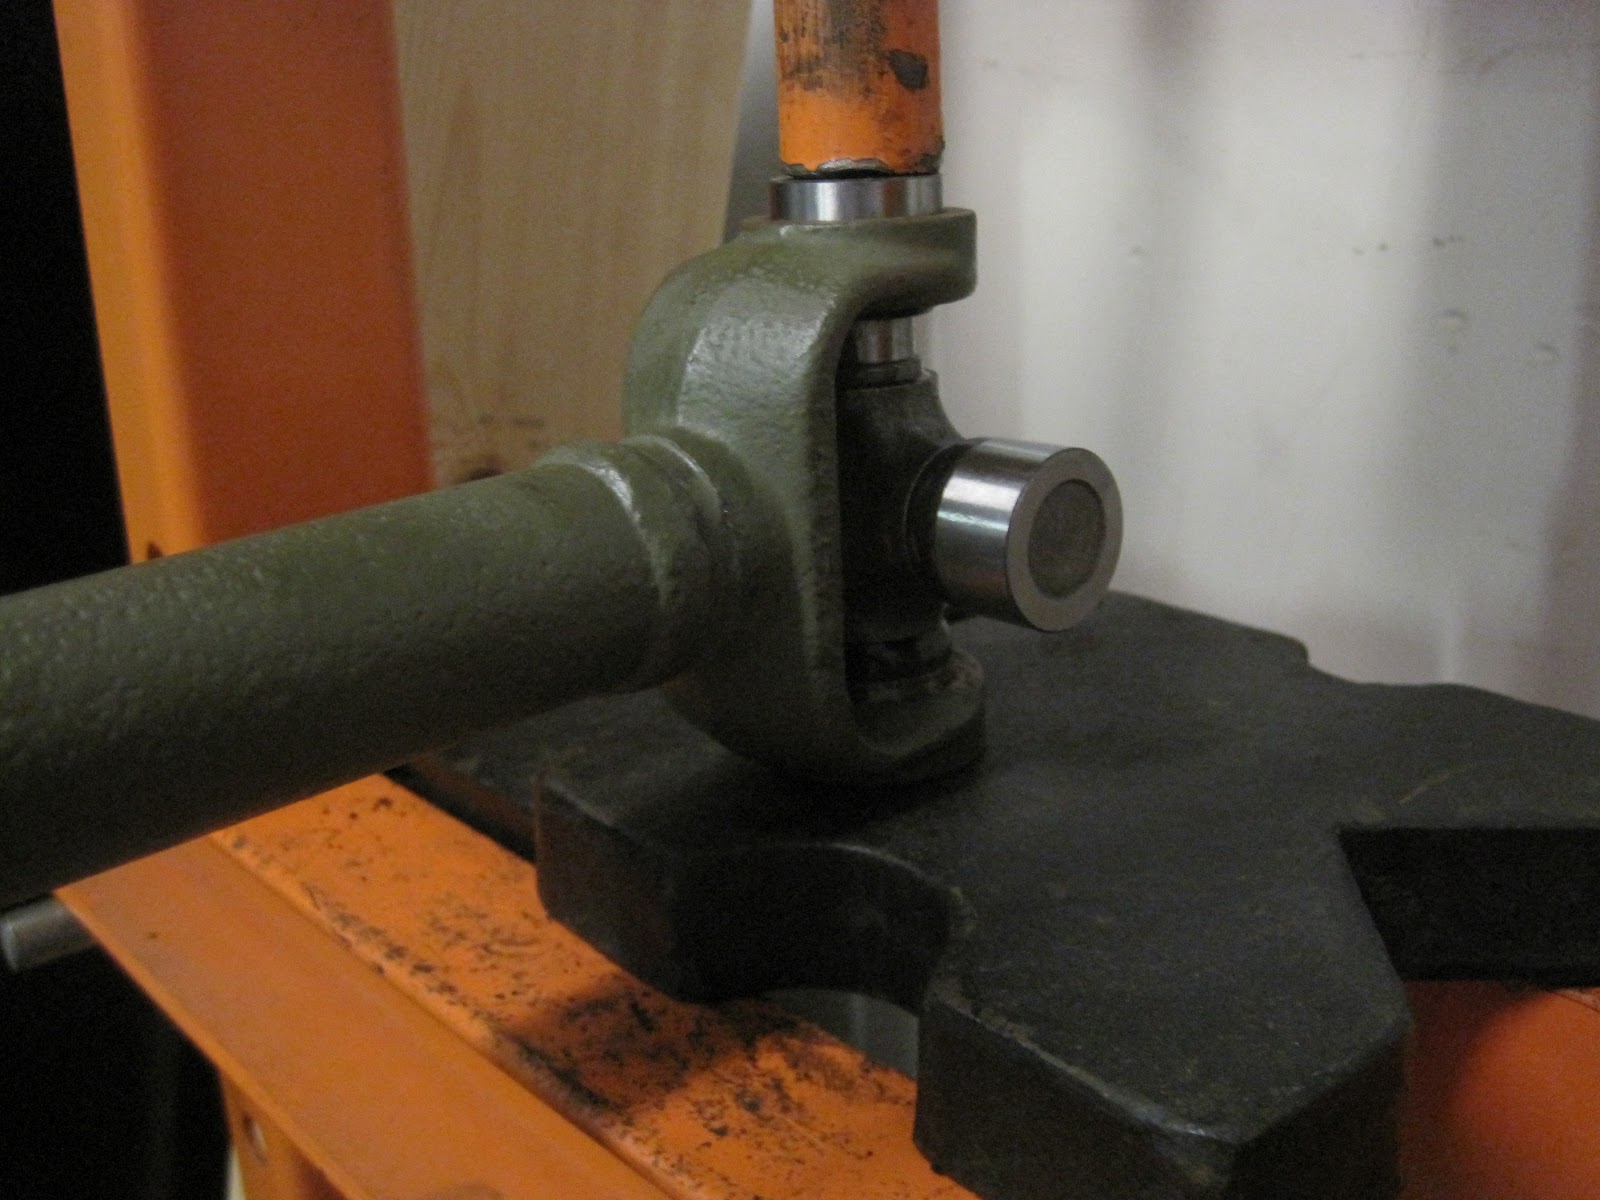
First step: fit the new bearing onto the output shaft. This is an extremely tight fit, so I had to place it in the 12 ton press. I didn't want the new bearing to take the brunt of the pressure, so I used the the steel insert part of the old bearing. It virtually disintegrated when I removed it from the case. It has the exact same specs as the new one so it sat perfectly under it while the new one pressed on. It seems very logical to use the old bearing for this job, but for some reason, it took my brain awhile to figure it out! Bubba would have been shaking his head in disgust at some of my original ideas before this thought developed!
 |
| Pushing the new bearing in place. |
I started off by putting the components back on the output shaft and getting it back in the case. To do this, the shifting fork (that puts the jeep in high/low gears) goes in first. Then, I could fit the output shaft in place. The hardest part was after the output shaft was in the case, I needed to install the snap ring to hold the gears in place. During the disassembly phase, it was this snap ring that broke (due to incorrect tools...don't have to worry about that now...THANKS, Colonel!). I needed a third hand for the install. I had to keep wedging it up the shaft with the aid of a few screw drivers. One to lift and push it while the other screw driver held the opposite side in place. Truthfully, a trained octopus would have been the best option.
 |
| The shifting fork. |
 |
| The output shaft in place. New bearings and cups, as well as one new snap ring. |
 |
| Here is a view of the new snap ring. This is the one that I needed the octopus for. |
 |
| Nothing of importance to see. I just wanted to show the mass mess and chaos that I seem to make. |
The next item to clean and restore on this hit parade is the front output cap.
 |
| Front output bearing cap: as a reminder, this is what I started with! |
I was a bit intimidated with it, but once I got going, it really is very simple. Basically, it holds the second shift fork that puts the jeep into four wheel drive. Out comes the fork, then I tapped out the shaft, and removed the clutch gear.
The first part that proved challenging was removing the over sized snap ring that keeps the bearing in place. I ended up soaking the stuck snap ring in penetrating oil for the night. The next day, I was honestly quite surprised to see it move! There is a small notch cut into the case that a screw driver fits into and then will act like a wedge to push the snap ring together. I used the aid of a smaller screwdriver to begin working it out of the channel...and then POP...goes the weasel. The notch is barely visible in the above picture. It is in the 3 o'clock position nearest the left shaft. The clutch gear (the donut looking gear previously was sitting in front of it.
With the snap ring out, I tapped the shaft from the front side and it and the bearing fell out...on the workbench. What I thought would be the easiest job...removing the three oil seals... proved to be the most difficult. In the end, I needed a punch, a hammer, a flat headed screwdriver, a chisel and A LOT of patience! The last thing I wanted, or needed, to do was to scratch the smooth surface that the seals slide into . All is well that ends well. In the end, I got 'em!
 |
| Front cap with seals removed, internals cleaned and tools used! |
 |
The remains of the larger seal are at the bottom of the picture.
The two smaller slide rail seals (small holes, left side) are about to meet their maker! |
 |
And the small rail seals...destroyed.
Maybe because Easter is here, I thought the case resembled a scared bunny rabbit...or maybe a monkey? |
Putting it back together is just the reverse...I did the seals (used a socket and tapped them in), then the bearing followed by the snap ring. I seriously was dreading the snap ring, but it turned out to be a cinch. I think I might specialize in rebuilding this component. Too bad not everyone needs one. The shift rail went in and then I slid the gear shaft in place. The clutch gear and fork assembly all went in together. I had to line a hole up in the slide rail to meet the screw in the fork. Once screwed in, a safety wire then tied the screw in place to secure it.
 |
The new and improved inside! The old bearing is sitting in front.
I can't even make it spin because it is so gummed up with gunk and rust. |
 |
| A view from the front. |
In my last entry (painting the frame), I mentioned that the missing link-single dust felt seal (the dollar part!)- was the minor part that is keeping me from progressing any further on the transfer case. Well, Sunday turned out to be a roller coaster of jeep emotions. Let me recap...
I went to the garage early, 0645, waaaay before any of my family peeps would be out of bed. I wanted to get a leg up on installing my Speedi Sleeves. While rummaging through the chaos of my work bench, I was inventorying (for the umpteenth time) my package of transfer case gaskets that I bought several jeeps ago. (I use the gaskets as templates so I can make my own...yes, I can be that thrifty.) Low and behold, laying silently in my clear plastic package was a felt dust seal! Buggers! I never noticed it before! Jeep emotional roller coaster = riding high! Now I can do the whole kitten-caboodle today. Big plans.
 |
The first thought that ran through my head upon discovery of the felt donut like dust seal was the infamous words of Colonel Klink to Sgt. Schultz, "Schultz, you DUMMKOPF!"
Despite my stupidity, I am bursting with happy happy joy joy on the inside. |
I got excited with my Speedi Sleeve and didn't take any "before" or "during" pics. Basically, it is a thin, tight fitting bushing that fits over a worn out surface. It comes with a cap that is placed over the sleeve and you pound it into place. Before fitting the sleeve, I filled in the worn groove with an epoxy and coated the inside of the sleeve with a light brushing of non-hardening sealer (like what I use on my gaskets). Then, once in place, the flange breaks off for an unobstructed surface...to stick my darn felt dust seal.
 |
This is the Speedi Sleeve (silver part) already in place on the front output yoke.
I still have to break off the flange from the bottom. |
 |
| Speedi Sleeve (in my hand) coated with the sealer, rear output yoke on the bench. The yoke sits inside of the parking brake. |
 |
| Sleeve installed and the flange is being removed. |
 |
Front output cap gasket in place. The rail protruding is the Hi-Low shifter.
The case is actually laying upside down. |
 |
The Front Output Cap is installed and now the poppet balls and springs need to be inserted. The smaller interlock is already in the case between the two shift rails. The balls an and springs apply extra pressure to the shift rails to keep them in gear. There is a hole in the bottom left of this picture.
One set goes in there and on the opposite side of the case is the second hole for the second set. |
 |
| The Rear Output Cap shims (resting on the cap) and the speedometer gear (also on the shaft) in place. |
 |
| The felt dust seal is in position at the base of the yoke and ready to be slid into place on the rear output cap. |
 |
| The tricky part was reaching the bolts that are tucked inside of the parking brake. Also pictured is the safety wire that meanders through all of the output cap bolts to help keep them from spinning loose. |
 |
| Bottom cover gasket in place. |
With the transfer case now fully assembled, I could mate it with the transmission. The interlock plunger fits between the two cases and must be done prior to bolting them together. The plunger helps keep the transmission shift rails in gear. I coated it with a glob of grease to help keep it in place during the final assembly.
 |
| Finished transfer case! The 4-wheel drive and Hi-Low shift sticks will get installed AFTER the tub is mounted on the frame because the hole in the tub will not accommodate the angle that the shift sticks sit. (Say those last three words really fast!) |
 |
| The second to last piece of the puzzle is the interlock plunger that fits in he channel between the two nickle-sized holes. The final piece of the puzzle is installing the large gear, washer and castellated nut that sits on end of the transmission main shaft inside the left side of the transfer case...that same nut that gave me a run trying to remove it! |
 |
| Shhhh...mating transmission and transfer cases! |
With it completed, I was very excited to get the cases mounted on the frame cross member. Jeep roller coaster meter is running sky high. Then, I realized that I did not have the right sized bolts to attach it to the mounting plate. Roller coaster enters a valley. I run to Lowe's and get the hardware. Roller coaster climbing. I get the case perched on the cross member, but I cannot get it to sit level. I eventually discover another "dummkopf" move. I've got a darn CJ2A (postwar jeep) transmission cross member installed. Where the hell were you on that one, David??
I immediately plummet into another valley. I go to the jeep junkyard (my side yard) and inspect the candidates over there. A-HA...I've got one...actually, I've got two over there. The downside is that they are both installed in a jeep WITH the transmission and transfer cases. Ouch. Another big, dirty job.
I go inside, take a shower and fall asleep while plotting my course of action. Upon awaking, I go to the junkyard in my yard and proceed to remove the cross member on jeep #3 (the nastiest one). I get it down, remove the T90 tranny/transfer combo and get my new cross member.
 |
| CJ2A clean and pretty, but not what I need. Subtle differences. |
 |
| Side view is a bit more obvious. CJ2A on the left, WWII on the right. |
Ironically, the main reason I painted the frame was so the cross member would be ready for the trans/transfer cases. Ha..it showed me. Due to the annoyance of mixing the paint, I might end up waiting to paint the correct cross member when I paint the tub. That might give me the incentive I need to fix the last area on the tub. And ironically, that last area is where Bubba cut out the transmission hump area to accommodate the T90 transmission! My roller coaster is climbing.