Saturday, October 29, 2011

Bo's Body Shop: Working It Upside Down.

I tried...I really, really tried to wait until I did ALL of the repairs to the underside of the tub before boring you all with my repairs which are basically the same as all of the other gibberish you have watched me do.  However, my progress has been quite slow due to not being able to find adequate time!

I have managed to do a little bit each day this week and I've been concentrating on the driver's side rear corner and wheel well.  I picked that area since it was the largest spot of nastiness.

Driver's side rear corner.  Nice and nasty...just how I like it!
This would be a two part process once the old stuff was removed.  The actual wheel well (the spot with the glaring rust through in the above picture) would need to be installed first and then the area on the rear panel corner would be fixed.  Before cutting EVERYTHING out, I made my lines of projected cuts and then made up my cardboard replacements.  Satisfied that my cardboard would be "close enough" to the real thing, I felt comfortable removing so much steel (albeit nasty steel) from the tub.

For whatever reason, the picture will not rotate.  However, this is the rear panel corner removed.  The circular part will be reproduced.  This is where the tail light will be fitted.

The wheel well was made out of a thinner gauge steel and was very easy to bend.  I sketched the dimensions on the steel, cut it out and then used the base of the hydraulic jack to make the bends.  It worked quite well.

The wheel well being made!

Almost done...but a few more bends to be made.
Once completed, I made up the replacement for the rear panel.  I wanted to get everything in and test fitted before actually welding it all in place.
Everything in!  Ugly, tbough.  I still need to clean it up a bit.

A view from the outside.  I am very pleased with the seam on the right hand side.  I had to pinch and clamp it from the backside and then do a delicate weld to keep it snug together.

Somewhat symetrical!  And its obvious what needs to be fixed on the other side.

Gratuitious kid shot.

Not quite sure what to say about this.
Hindsight and lessons learned:  I probably should have cut more bad metal out of the wheel well.  It would have made it a lot easier installing the new piece.  the reason I opted to remove less was that I didn't think I could get the trailer socket wire hole relocated accurately as well as a pin on the inside of the well that will be used for the trailer socket cover.  If there is a next time, I am going to opt for the slightly more difficult route if it will get me a better result.  All in all, though, I am satisfied!


Saturday, October 22, 2011

A Fork in the Road: Splitting Up Two Mates

If I were a composer, then these piles of once upon a time heroic jeeps are my symphony.  If this junkyard of dead jeeps were to be my symphony then each jeep would represent one score from a Walt Disney cartoon.  Thus, what happened yesterday and today could then be considered the bridge to more spectacular, take my breath away, jump jiving and wailing music that I am conducting/composing.   What follows is how it all went down.  And I have pictures that may or may not have been staged to prove it.

The steering wheel tried to become my nemesis.  I tappity tapped that guy with varying degrees of power with a hammer while frequently squirting it with penetrating oil.  Sometimes all at the same time.  No dice.  I hit from the top.  I hit from the bottom.  I even whacked a piece of steel that would then whack the wheel...and the wheel was having none of it.  I tried to use a bearing puller, but it was too small.  Retiring with frustration, I went to my standby guru:  the forums at G503.com.  I researched what others did when faced with the same challenge.  Some bought fancy tools, others made fancy tools and then some used what they had when they didn't have anything fancy at all.  I resigned myself to buying a fancy tool on the morrow since I had two more jeeps to dismantle after I finished with the current one.  However, for the meantime, I thought I would try what worked for someone else without the fancy tools.  I was advised to jump into the jeep, place my hands at the 2 and 7 o'clock positions and wiggle like hell.  Then move my hands to 5 and 11 and wiggle some more.  Loosen the nut (but keep it on the column so when the wheel pops, you don't tumble out of the back of the jeep) prior to wiggling.  Just in case I had success, I made Jack spot me to ensure I DID NOT TUMBLE OUT THE REAR of the jeep.


Wiggle with a spotter.

It moved!!
Amazingly, Jack and I encountered the sweet smell of nasty, old rusticated jeep surrendering success!  Pop goes the steering wheel.  Now we can remove the tub!  And I went to bed with a brilliant smile on my face and Sarah had nothing to do with it!


Jubilees amongst the sweetest smell of jeep funk and success.

Today, I removed the few screws that bolted the tub to the frame.  Two of those little bastards resisted, so I resorted to the cut-off wheel.  Now we were officially ready for lift off.  I brought out the lift and a couple of straps.  At precisely this moment, Sarah ran out to do some shopping and Jack wanted to hang out with me.  Maybe it was because he felt he should stay to dial 911 or maybe he was truly interested in what I was doing.  Nonetheless, he was now my wing man...and I really wasn't quite sure how I was going to lift the tub off the frame.  I kept my fears hidden, though.

Amazingly, we suffered very few set backs.  Despite the challenges, we persevered with superior intellect and strength.  At one point, I had Jack manning the Jack, jacking it up, letting it out and rolling it around while I went hulkamaniac by lifting and pulling the rear of the tub.  Up, down and spin it around and BINGO...we had it completely airborne.  Now what the hell do I do with it?

Well, for starters, Jack and I rolled the chassis back into the garage.  Now we could at least set the tub onto the ground.  Next, we had to figure out how to flip it over since the point of this endeavor was so I could have easy access to the dirty underside.  I'm still talking jeeps here, ladies and gentlemen.    I quickly formulated a plan, called a huddle with my jubilant son and then we set out upon our mission.


Oh, yeah.  We landed this baby!  Jack's nervous smile represents my next plan for flipping it formulating in my head.
I placed a rolling cart beside the tub.  I then lifted from the opposite side and had it vertical.  I spun it around 180 degrees and while I landed it back down, Jack was on the spot with the jack stands for the four corners.  We had it in place and I think we did it very safely. 


Flip it over.  We're done!
While scraped a ton of dirty grease and muck off of it, Jack got to work on his jeep.  I think he had to remove the brakes, engine and carburetor from it and hoist it into the air.  At least this is all that he told me. 


And we still had time to work on Jack's jeep!  He did THAT all himself.
Bright and early tomorrow, I'm going to knock the rust off of that baby.  All in all, it really isn't too bad.  The hat channels are better looking than I thought they would be.  Truthfully, they only need replaced in the corners.  Everything else that has to be done is in the rear areas and I had already knew about them!

Scraped the mud off.  Upside down front view.

Post mud scraping from the rear.
And to think that I am pleased as punch to have it look like this right now!

Thursday, October 20, 2011

Change of Scenary: The Front End


I went ahead and finished up the cowl area of the tub.  All of the ugly paint has been removed, the quarter-sized area from the antenna repaired and all of the gauges and almost all of the wiring is out and a fresh coat of primer was applied.  The last bit of wiring goes to an aftermarket push-pull light switch that has quickly burrowed itself into my bum and has become a bonafied pain in the arse.  It isn't original to the jeep...I don't think it is of military origins...but I'm not 100% confident that it isn't valuable to someone (after all, look at the crap I have bought and brought home!) so I do not want to man up and incredible hulk that mini monstrosity out of there and risk damaging something in the process.  Instead, I am taking the ostrich approach to life and am kind of ignoring it until I can come up with a sensible plan.

The dashboard.  And Jack's gas can.
So, since I am ignoring the wires, I thought I would shore up the remaining tidbits that need attention along the topside of the tub.  Well, I have come to the conclusion that those tidbits multiply at night.  No matter how many I fix, my punch list keeps growing!  I fixed that antenna spot, cut out the four pieces of bubbafied pipe that held on the bubbafied top and repaired the damaged areas associated with said four pieces of pipe.  Welded in the replacements for the support brackets on the rear panel.  I'm sure I did something else, but darn it if I can't remember it.  I did find another hole the size of a dime that I missed a few weeks ago that will get welded shut.  Oh, and the last thing that I started, but have yet to finish, is fab up and set in (not welded, yet) would be the bottom of the two vertical reinforcing channels in the rear panel.  When Bubba cut the panel out, the bottom portion of the brackets were probably buzz sawed and now do not reach the floor.

Little baby-tiny brackets on the bottom of the vertical reinforcing channels have yet to be welded into place.
Next up was the grill...I already did the grill of Jeep #2.  My theory was to clean #2's up and stick it temporarily onto #1. I thought that removing the headlights and their respected harnesses would take awhile.  Nope, like everything else I do...I did it fast!!  Harnesses removed intact, so I cleaned up and did a few minor repairs to the grill.  While I was at it, I cleaned up and primed the black-out marker lights, too.

Two marker lights and the unmentionable radiator stay rod hanging out together.

Held captive behind bars...and evidently enjoying it!
With the grill out and done, I needed something else to occupy my hands with.  It just seemed reasonable and within reason to make the radiator the next apple of my eye.  The two nuts that hold it to the front cross member were being stubborn.  I'm not going to lie here, either...the two nuts are in a somewhat awkward place to reach and my back was feeling a bit tight.  The tightness was a result from an old war wound I'll tell you about over some beers one day.  Nette, do not shake your head at me.  Anyway, I lubed them up with some penetrating oil and would tackle them in 24 hours.  Besides, a dark fear that always looms over my head is that I will end up breaking the bolts off accidentally.  I've done it before...I guess that is where the fear comes from.

24 hours later did the trick and off the nuts came.  From what I can tell, the radiator should be fine.  I did A LOT of scrubbing on it.  I was surprised to find that it was still holding antifreeze.  I'll take that as a good sign.  The rear shroud has come loose and will need to be soldered back into place.  So far, that is the only thing I have found that will need repaired.  Jack applied water to it and I scrubbed the fins with a tooth brush.  As a result, we now have about a truckload of gorgeous red clay that only Georgia can offer sitting in our backyard.  Who would have thought so much dirt, clay and small twigs could live in such a small area like between the rods of a radiator?

Thar she blows!  Not really.  Just Jack spraying the radiator and me.  Child labor...gotta love it!
The last little thing I dabbled with was the fan that bolts to the water pump.  Hey, it sits right behind the radiator which in turn, sits right behind the grill.  At this rate, the engine will be done this weekend!  Probably not, but a kid can have dreams, right?  I'm hoping to get that steering wheel off without breaking it) and then give the tub the old switch-a-roo and flip it like a pancake so the underside can get fixed. 

No, this is not a boat.  Its the fan fromt he water pump.
I'm also tempted to start cleaning up the front frame areas so when I bolt the fenders and the grill back on to push this thing of beauty into the yard, it will look respectable when the neighbors ask to look under the hood.  It all has to get done sooner or later...

Here's what I'm now looking at in the garage.  Can you blame me for wanting to clean up the front frame area??


Saturday, October 15, 2011

Third time's a charm...or is it strike three, you're out!

So, since our last meeting of jeeper-a-haulings, I've been getting busy.   I couldn't stand seeing that blemish on my rear end so I went ahead and had it cosmetically doctored up.  I cut the piece of steel and welded it to make the jerry can (or is it gerry can?) reinforcing plate complete, and then was able to finish priming the back nine.  Once the actual gas can sits atop its bracket and a spare tire is mounted, nobody (except the three people reading this blog) will ever notice the once upon a Bubbafied time when the rear panel WAS a tailgate!

I took a day's break resting on the monumentous laurels of the major tub job and did nothing.  Truthfully, I hadn't planned anything beyond that point.  So, as a filler for jeep work, I cleaned up all of the bolts and retapped the nuts that will be used to attach the fenders to the frame and grill.  I then removed the grill from jeep number two (the USMC radio jeep) and went about joyfully cleaning it up.  It was remarkably straight and did not require any major repairs.  The paint came off somewhat easily and within an hour, I had shiny metal glaring in my eyes.  Just about that time, my Inspector General was waking up so I gathered her out of her crib and had some coffee while she ate some waffles.  After breakfast, we both went out to the garage to check on the grill.  I was able to scrape off the remaining paint in the hard to get areas while Nora pointed at the next spot that needed attention.  Upon her approval, I rubbed a rust prohibiting chemical on it and then we spray painted it.


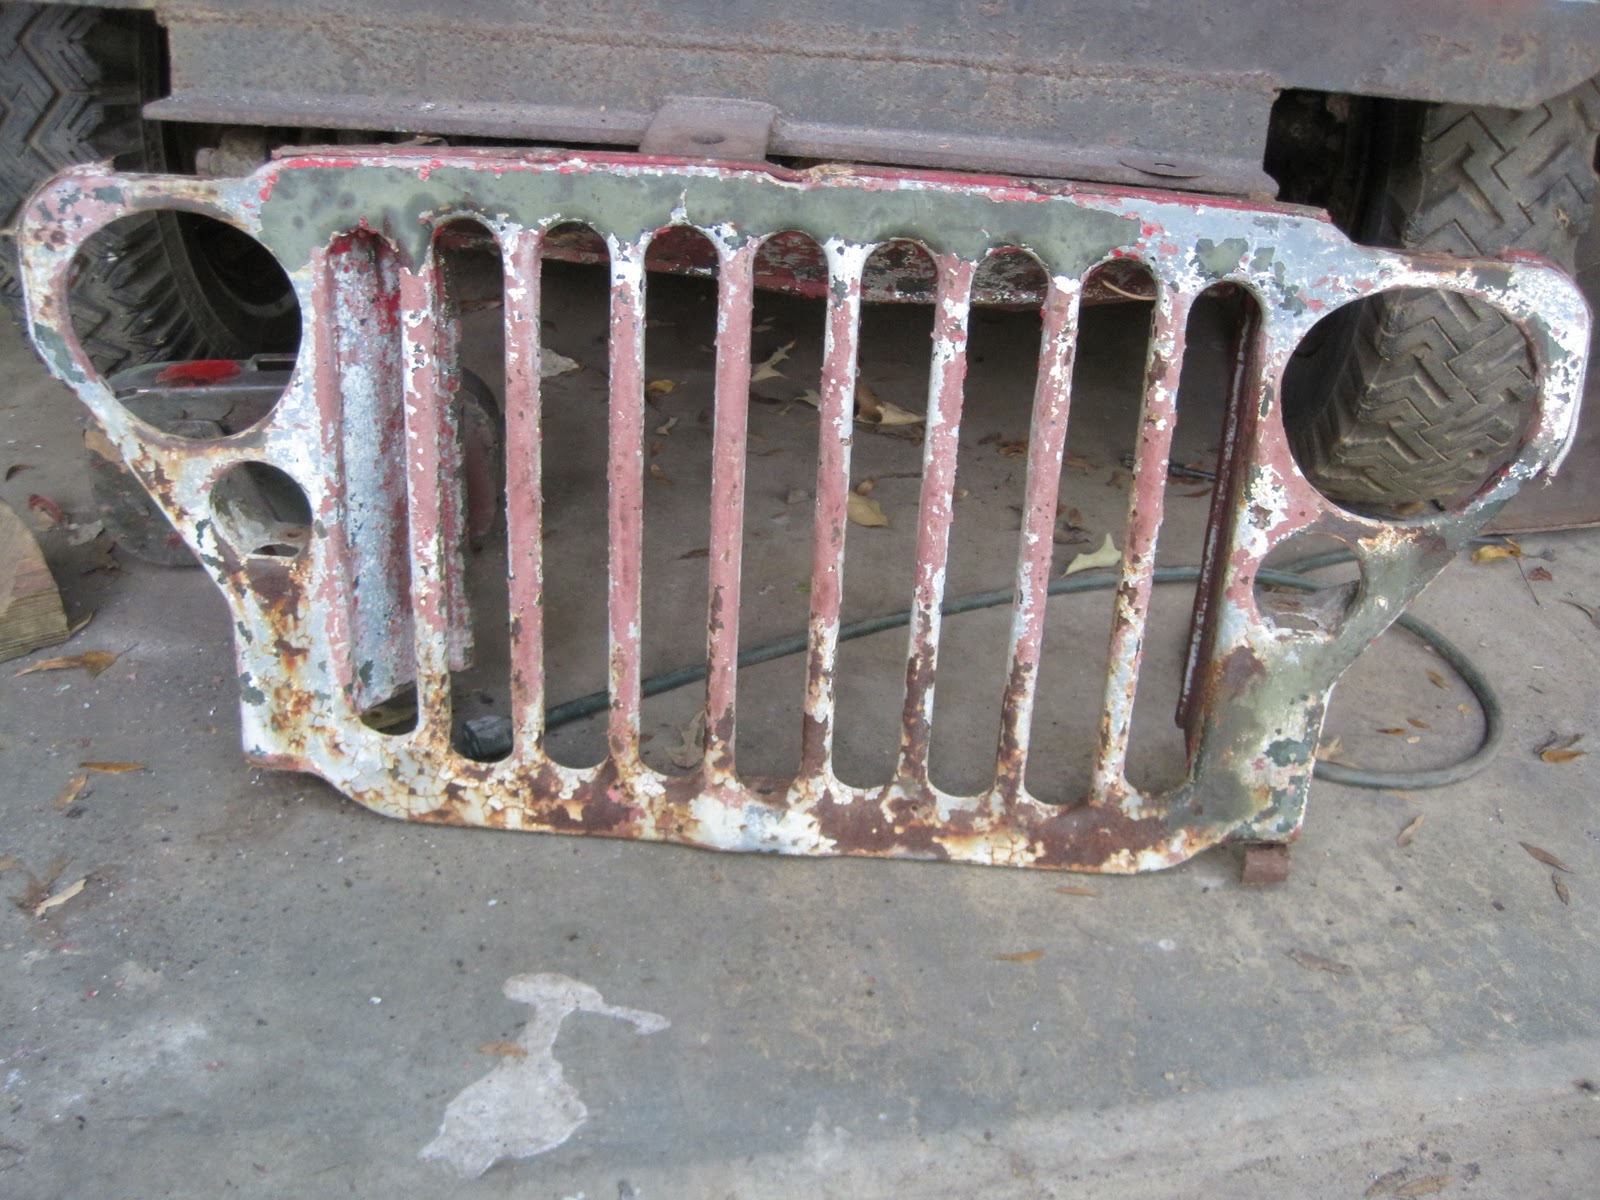
The grill of Jeep #2 before the clean job.

Definitely the approving nod from the Inspector General.

"Discotech!  Lets bolt this be-atch on a jeep!"  I'm fairly sure this is what Nora said after we painted it.

That afternoon, I began dismantling the grill on Jeep Number One.  I may attempt to make my own wiring harness, so I was trying to be EXTRA careful in the removal of the original one.  Amazingly, my steady hands and neverending patience won out and I was able to successfully salvage the original headlight harness AND the black-out light harness.  Victory.  There were several clips screwed into the upper and lower portions of the grill that held the harness in place.  Unfortunately, about half of the screws were beyond recognition and I ended up griding them off.  The flip side is that all but one of the original clips can be reused.  I haven't had a chance to clean that grill up, yet.  Also on schedule for it is to remove three broken off screws (which I did not break!).

Yesterday, I bit the bullet and made my last trip to NC to pick up the third little pig.  This was the worst looking jeep of the three.  Truthfully, it is barely a jeep...but, it CAN be recognized as once having been a jeep.  As a matter of fact, when I stopped at a gas station, a WWII veteran commented that it looked A LOT like his jeep when he last lost it in 1943.   Then the other bright, or not so bright, spot along the journey home happened when the jeep and I caught up to a military police HUMV convoy on I95.  Crazily, all of the GI's looked away as we rode buy.  I think the jeep was embarrassed, too.

Anyhow, this Willys, built on 6/8/44, actually tried to resist me taking it home.  I hope it wasn't because it resigned itself to going ahead and dying in the field where it has been sitting.  Oh, no.  This guy may (or may not!) be whole again, but if nothing else, it DOES have a lot to donate to making a completed jeep.  Besides having a great frame, two good axles, three leaf springs and a couple of fun bolt-on pieces, it has the matching glovebox data plates and frame serial tag  AND  the tub serial stamping that dates it to June of 1944.  This totally has the makings of a D-Day tribute.

When I said it resisted coming home, I meant it.  Two of the four wheels were locked, as in not rolling.  Russell, the great guy who actually accepted my money for these jeeps, had to fire up his tractor and drag the jeep around so we could get it aimed at my trailer.  I then backed up to the jeep.  With the ramps down, we attached his winch to the front axle and he moved the tractor to the rear to "help" push it onto the trailer.  Well, all we managed to do was push the ramps cockeyed.  Plan Two:  position the tractor to the side and connect a chain to the front axle of the jeep.  Since there isn't an engine in it, it was quite easy to accomplish phase one.  Phase Two of Plan Two:  lift the jeep skyward and back the trailer under it.  Objective completed.  Phase Three of Plan Two:  reposition tractor to the rear of the jeep, attach chain to bubba-ed bumper, and go airborn again.  Once in the air, Russell gently pushed the rest of the jeep onto the trailer.  MISSION ACCOMPLISHED!

Despite the two locked wheels and four flat tires, I still went through the complicatons of strapping all four corners down.  Four hours and forty-five minutes later, I backed this beauty into my driveway.  Nobody was at home, so I set about cleaning out the inside of the jeep.  TONS of leaves and debris.  Once everything was out, it was easy to see what I would be dealing with.   Realistically, it is more like what I am not dealing with.  Basically, the entire floor is gone, vanished, poof...disappeared.  But that was pretty much expected from the beginning.

Maybe not its best profile angle.

And truthfully, this might not be its best side, either.

I think I can see a bit of a grin in that ORIGINAL bumper. 

This does nothing but make that rear panel repair I did on Jeep #1 look AWESOME.

Who knew so much crud could sit where there isn't any floor?!

After a run through at Bo's Car Detailing Plus.  Check out the steering wheel. 
Think that happened the same time the rear panel got crushed?

Just a different perspective.  I'm not sure it helps, either.
Before calling it a day, with the jeep still secured on the trailer,  Jack and I filled up all of the tires and they seemed to hold the air.  I played around with the transmission and was able to get it into neutral.  Amazingly, the tranfer case also seemed to move and I was able to get it out of four wheel drive.  That was a good sign.  We then went to each wheel and jacked up the jeep to spin the tires.  Remarkably, three of the four would spin.  I guess dragging it around the field in NC helped to free one of the wheels.  Only one remained frozen and that was the front passenger side.  I really wanted not to take Russell's dad's advice in getting the jeep off of the trailer:  "Find a strong, sturdy tree...like a White Oak.  Wrap a chain around the tree and connect it to the jeep and just drive away."  

No, I really wanted to roll this guy off the trailer.  So today I spent a little bit of time knocking a turduckling of greasy dirt off of the hub.  Now that I could acually see the hub, I squirted a bit of penetrating oil into the edges of it and tapped around the surface with a hammer.  next, I opened it up and removed the spindle nuts, washers and bearings.  It was messy, but I was giddy as a doofus because I got to use several of my old school WWII tools that were made specifically for this job!  With the bearing out, theoretically the brake hub, with the help of some wiggling, should have slid off.  It didn't.  And adjusting the brake pads with the eccentric screws on the rear of the hub did not help, either.  However, I was overcome with joy just when I got the screws in the rear to move.

In the end, I used the BFH and a small steel bar and tapped around the edge of the hub until it came loose and then slid off.  The brake pads looked like they had a lot of life left in them, but no matter how much adjusting I did, I just couldn't get the hub back on.  As a last resort, I just removed the two brake pads and replaced the hub.  It was a bittersweet victory:  the hub now spins freely AND the drive shaft turns with it, but I had a couple of major, important parts left over!  Oh, well, the jeep doesn't even have an engine.  And Jack and I were able to push that beast off of the trailer!


Just a couple of the small, hidden treasures that are still on this jeep.  I know that beauty is in the eye of the beholder.

It is hard to read, but this is the frame serial number tag that reads 340503 and it matches the glovebox data plate serial number.


Sunday, October 9, 2011

Rear ENDED!

I managed to get a few hours Friday afternoon for some garage jeep time.  Friday was my birthday and things were a bit hectic, but the peace and quiet within the sanctum of welders, grinders and hammers was like music to my ear-plugged ears! 

I took advantage of my limited time and was able to get the horizontal bottom dwelling pieces for the rear panel made and installed.  I also welded shut the smaller holes that were non-GI.  Saturday morning, I cut out about a dozen round pieces of steel that were the approximate size of a dime and filled in the remaining unwanted oversize holes.  Following that creative jaunt, it was then grind time smoothing out all of the Frankenstein scars along the perimeters. 

Not too bad.  But it always looks better BEFORE the paint is applied!
I feel fairly certain that the rear panel will maybe not fall off.  But if it does, I am sure it will occur while I'm driving and have somebody sitting on the rear bench seat.  Maybe I'll get my Mother-in-Law to test it out for me.  Murphy's Law guarantees it to happen then!  On the plus side, I have been pushing the jeep around by the newly installed rear panel and it appears to be solidly in place.

As for the inside wall of the rear panel, I still had some things to do.  When Bubba first removed the panel, he also took out parts of the supporting hat channels as well as the vertical braces that connect the side walls to the rear panel on both sides.  The hat channel parts were in the four corners and were quite small, but I wanted to get them back in.  I decided to leave the wood blocks in place and weld the hat channel replacements over them.  I figure the next poor, dumb guy that restores this jeep in sixty years will get a chuckle when he finds them. 

The hat channel pieces are on the bottom right.  The fourth piece is not shown.  It test fit so well that it was like socks on a rooster and would not come out!  The triangle is the upper part of the side wall/rear panel brace.  The two nasty pieces on the left are the old parts that need to be made.  They are also part of the side wall/rear panel brace.
I welded in the small parts pictured above.  I made the replacements for the other two items shown above, but I am waiting to install them.  The holes in them have to be precise since the jerry can holder will be bolted through one of them.  Those bolt holes are going to line up within the small vertical section that I had replaced on that back panel.  Besides drilling in a few holes in the back panel (yes, I know I filled a bunch in, but they were in the wrong places!), I still need to make the left hand side of the jerry can brace plate.  That will fit into the unpainted part of the rear panel seen below.

Rear panel primed and looking decent.  At least all of the rolls match the rest of the tub!  I'm obviously shooting for the "been there, done that" look.  The two lower corners (near the circle tail light cut-outs) still need to be replaced, but I think I will do that when I remove the tub from the chassis.

Another view...I take solace in the fact that the jerry can and spare tire will cover a lot of my scars!  But hey, I converted it from an ugly Bubbafied tail gate to its original solid configuration!
I do have to go back and do a little more sanding on the exterior bottom edges.  While I was grinding down the weld marks on the inside, the metal heated up a bit and made my paint bubble on the outside. 

Now, the major exterior repairs to the tub have been accomplished.  I am undecided in which direction to turn my attention.  I could clean up the grill on this jeep and bolt the fenders on and then it won't look so offensive.  Or I could take the tub off and do the repairs to the underside.  Or option number three...begin the tub repairs on jeep number two.  I'm leaning towards jeep number 2/3 being the one that gets sold.  It would make sense to me to get cracking on that guy so I can get some funds to apply to jeep number one.   Any takers? 

I'm thinking I'll do the grill, reinstall the fenders and then push this good looking soldier into the yard for awhile and give jeep number two some garage time.


Thursday, October 6, 2011

Working in the Rear

Today, I had an opportunity to get down and dirty...with the jeep, of course, so I chose the bare-all backside.  For those that have never read this blog, or if you have short term memory loss, or if you read this blog, but really didn't pay attention, here is the current status of the rear of the jeep:  Bubba had once upon a time cut the rear panel out to make a tailgate and then spot-welded it back in place when he realized he was too big to sit on it.  I had removed the panel, cleaned up the area and today, set about putting it back in: permenantly!


The wide open, see everything, no secrets in this closet rear end.
I used two small wood blocks placed within the supporting hat channels to hold the rear panel in place.  With the panel "hovering" in place, I measured and cut the two pieces of new steel that will run down the left and right side.  I also had to make a couple of ninety degree bends at the top of each piece so they would match the upper lip that runs around the entire top of the jeep's tub.


Here is a good view of the two wood blocks that are holding the panel in place.

I wrote notes to myself on the rear panel.  They were reminders of the different dimensions I needed to use as reference points so the panel would ultimately AND idealy be put back in its original place...plus or minus 1/8", of course!
With the edges of the rear panel cleaned and deburred, I test fitted the driver's side piece first.  Not bad, but like always, I had to do a bit of finagling to make it work.  Satisfied, I then did a bit of welding to keep it secure and then went to work on the passenger's side.  It was a thinner gap that had to be filled and it was a bit more challenging.  The second one alway is, right?  However, it eventually got a good enough fit and was awarded the priviledge of being welded in place, too.

Both sides welded and rear panel is securely in place!
I do not have a piece of steel long enough to cover the bottom edge with one piece, so unfortunately, I'll have to do it in two sections.  I have the right side cut, but not fitted, yet.  Hopefully I get this part finished on Saturday and have all the scars ground down.  So, if you're lucky, the next time you see my backside, I'll have it completely covered and primed.  Now that is something to look forward too!

I also still have to weld the interior edges and fabricate two small support brackets, as well as, two small sections of the hat channel in order to finish it up.  I haven't decided if I am going to leave the wood blocks in place or not.  Originally, they were there.  However, being wood placed inside of a metal box, a great instigator for future rust is thus born.  These jeeps were never intended to be around this long, so the builders didn't care so much about the long term effects of rust.  They needed something lightweight, yet sturdy enough to offer support...and wood fit the bill!  And that concludes your bit of jeep history that you certainly did not ask for.  Sorry.


Sunday, October 2, 2011

Fender Bender

 
The driver's side fender has taken me a few days to fix and prime, but it wasn't so much because it was a BIG job, but instead family and work took priority for awhile.  So, throughout the week, I sneaked off to the garage to work for a few minutes, or an hour, piecing it all together.  The most difficult obstacle I had to hurdle was just getting to Lowe's so I could purchase a piece of 22 gauge steel.  My scrap piece was not big enough for the size of the replacement panel I needed.   So, here is the recap...

I did another thorough cleaning and wire brushing with the hand grinder.  Once I could see the shiny metal glaring back at me, I could easily determine the areas that needed to be replaced.  There were a few areas that just had cracks running through them that could be joined back together with the welder.  Those were the fun and simple ones.  One spot on the inside fender needed to be replaced.  It was maybe 3" x 6" or so and it was right below where the fender-mounted black-out light's wire will pop through and run to the junction box.  I think, perhaps, it became bubbaficated when Bubba wanted to relocate his horn to the side of the fender.   And the other area, well, it was just plain gone.  Scotty beamed it up somewhere and it is still AWOL.  Actually, my super sleuthing detective skills have developed this hunch:  Bubba needed to either change the oil in the steering column box or to do some sort of repair to it and, for the sake of ease and laziness, just cut out a massive 10" x 14" section of the fender to reach the box.  

The driver's side fender (pre derustification) next to the already primed passenger side fender.

Cleaned up and able to assess the damages.  The massive AWOL piece would have been located in the lower right portion of the fender.  The other major area to repair is underneath the added chunk of steal (funky horn bracket) that is in the middle right hand side of the picture.
 The replacement panel for the side of the fender was fairly straightforward.  Once I cut it out, I spent the majority of the time trying to break up the dirt from inside the hat channel brace that runs along the back side.  It seemed like I was watching the neverending sands of time drain out of that channel.  Once that eternity ended, I could weld in the replacement.  Enough dirt/sand filtered out of it that I could have hit some bunker shots from the middle of my driveway.  The only mistake I made was cutting the replacement panel a little short on one side.  I had to be extra careful filling in the gap because with the thinner steal, I could burn a hole very quickly if I kept the torch on it for too long.

Replacement panel patiently waiting for me to stop hitting wedges and get back to work.
The AWOL piece was a bit more challenging to configure ad get into place.  I took a Cheerios box and mapped out the approximate size of the piece needed.  It would need to have a few different bends to it.  I pulled out another junked up fender from the shed and got some decent measurements from it.  I tried to use the section from the junk fender, but it wasn't complete (missing some areas).  I could have used part of it, but that would have added another couple of weld lines to my usable fender, so I opted not to go that route.

Once my drawing was done, I cut it out and then traced it onto my piece of steel.  After cutting out the steel, I put my cardboard piece back on it to compare and then to locate the approximate line of the major bend.

Marking the bend.
With everything looking right, it was time to fit the new piece into place.  Like always, I had to do the nip and tuck dance, but I finally got it on reasonably well.  Then I welded it and went to the soccer game.  Post soccer, I came home and ground down the scars.  This morning I had to fill in two holes made from an extra hood latch and prime it up!
Its kind of like watching paint dry.  But it is a good view of the piece that is no longer AWOL (lower left) and the where the bubbaficated horn was installed (beneath the circle hole inthe middle).
So, now I can either work on the front (the grill) or finish up that business of cleaning and reinstalling the tub's rear panel.  I'm jeep leaning (yes, that was a bad joke...even if you didn't know that jeeps do lean) towards the back panel.  If you really are that interested to know what I'm doing, come on over and look...or just wait until I write again!